Boxes are the elements thanks to which you can divide your landing page into parts. They are useful while adding the background under other elements to improve their exposition.
Add the box widget
On the left side of the editor, find the Box widget, then drag and drop it into the active area of your landing page.

Edit the box
Click on the box to start editing. You will see its context menu (1) and toolbar on the right side of the editor (2).
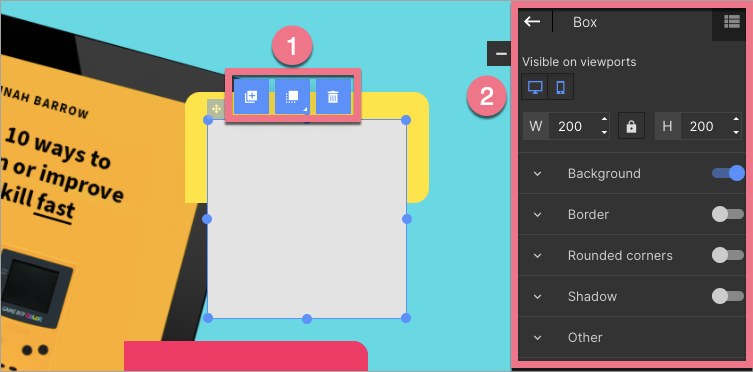
Context menu
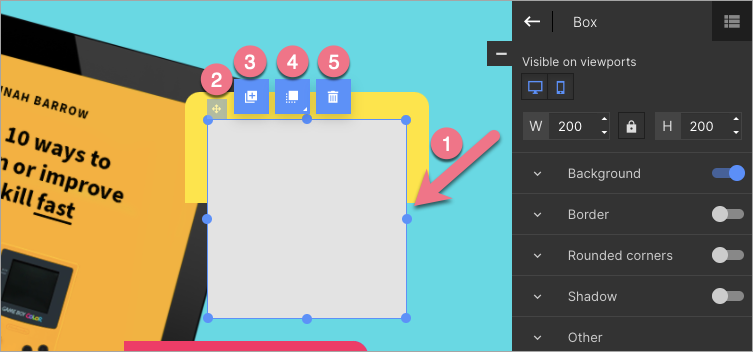
You can change the size of the box by clicking on the dots on the frame (1). The remaining icons let you change the widget’s position (2), duplicate the box (3), move it to the top/bottom (4), and delete it (5).
Widget toolbar
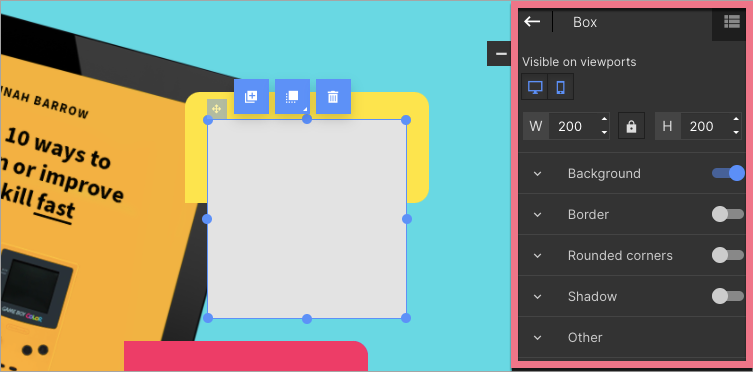
In the widget toolbar, you can turn on/off the mobile or desktop view (by default, the box is visible in both views) and change the box size.
Underneath, you will find tabs with some additional options. You can turn them on or off using the slider located in the right-hand corner of each tab (except the Other tab).
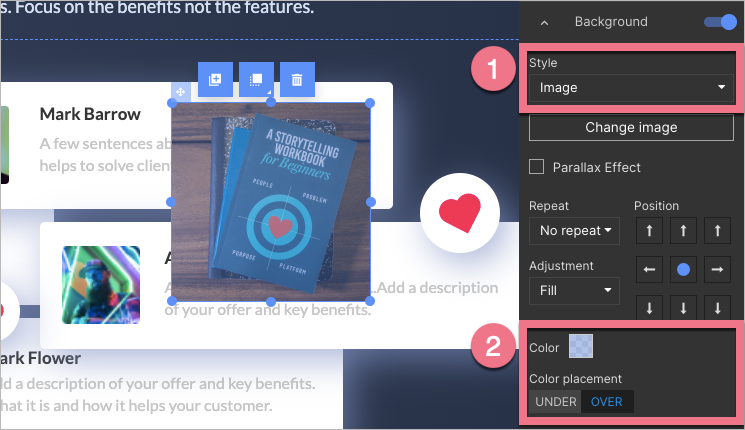
- Background – choose the style of the background: full color, gradient, or image.
- Border – adjust the parameters of the frame: thickness, line style, and color.
- Rounded corners – set specific values to round corners (the value can be the same for all corners or different for each).
- Shadow – set values for the shadow of the box.
- Other – adjust box position, copy the button ID or add a class.
Background
You can apply a layer of color to the image (1) in the box background. Click on Under or Over, select the Color (2), and then set the transparency level.
To get inspired and create even better landing pages, read our Landing Page Best Practices article.