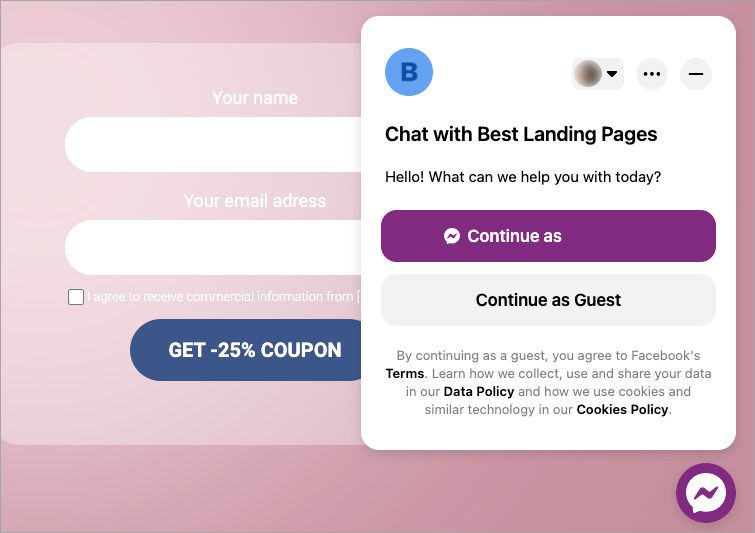
With Facebook Chat Plugin, your current and potential customers can stay in touch with you over Messenger on your landing page.
You can only access the plugin from the settings of your Facebook business page. If you only have a personal profile, log in to Facebook, and then in a new tab, go here to create a company page.
- You can also connect your landing page with Facebook Messenger via Zapier, so a new lead triggers sending a message via a chatbox.
Get your Chat Plugin code
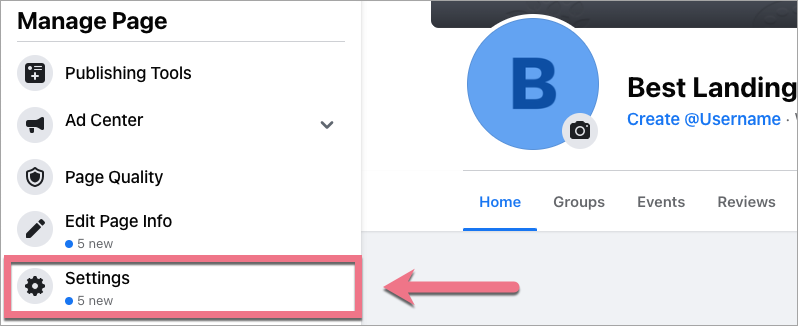
1. Log in to your Facebook business page. Navigate to the Settings tab at the bottom of the list on the left.
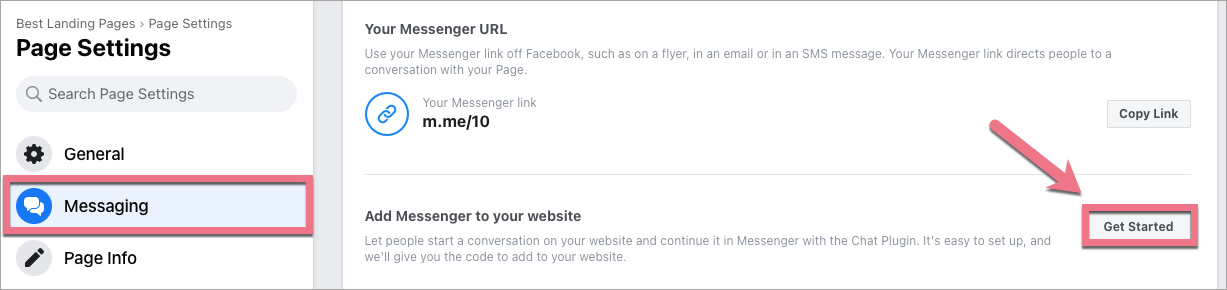
2. Go to the Messaging tab and then click Get Started in Add Messenger to your website.
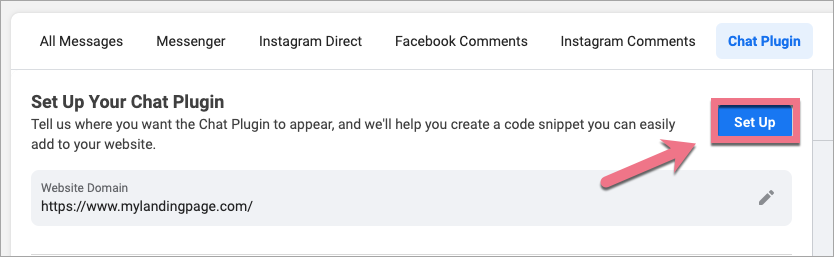
3. To configure the plugin, click Set Up (if you haven’t added any domain yet, you may see a note to start configuration and add one).
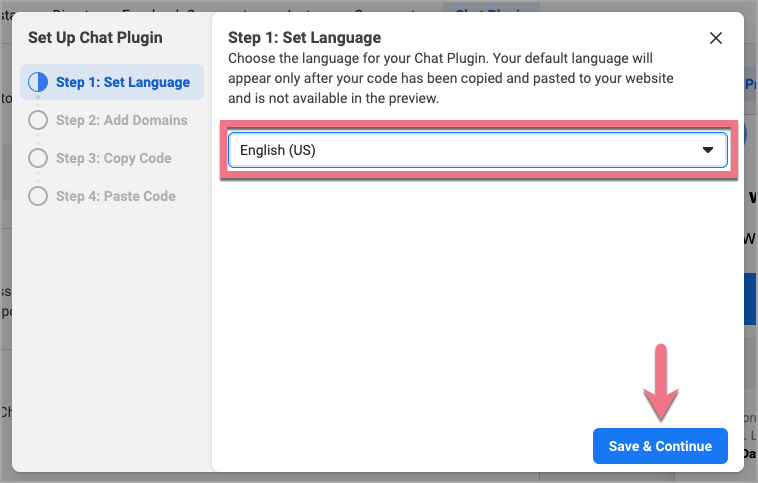
4a. Select the language of the chat and click Save & Continue.
4b. Add the domain on which your landing page runs. You can add more domains by clicking Add Domain. Then Save & Continue.

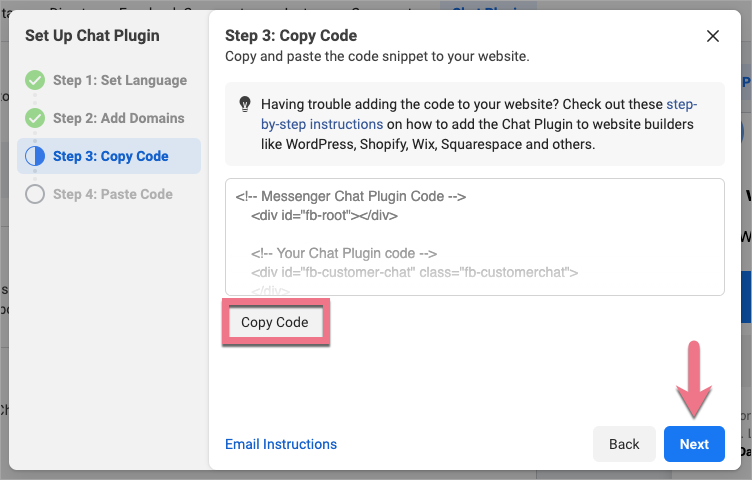
4c. Copy the code. Click Next, and in the next window, click Finish.
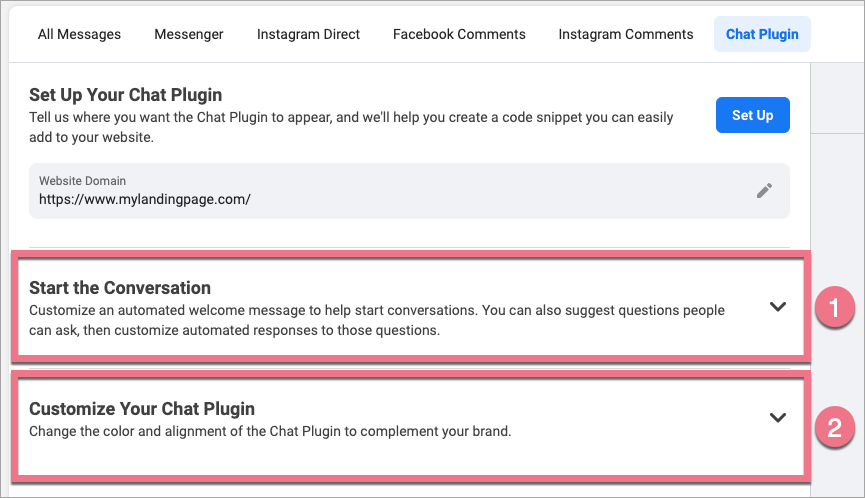
5. You can customize your chat. Choose how to start conversations (1) and change colors to complement your brand (2).
6. When your chat is set up, click Publish.

Install the code in Landingi
1. Log in to your Landingi account and go to the editor of your landing page.
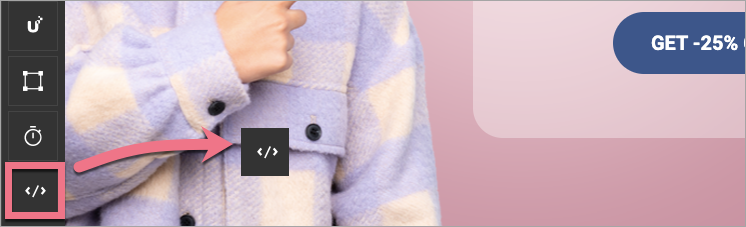
2. On the left side of the editor, find the HTML widget, then drag and drop it into the active area of your landing page.
3. Adjust the position of the widget. Click Change layer and Move to top.
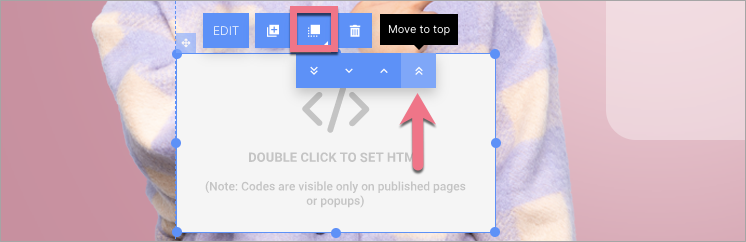
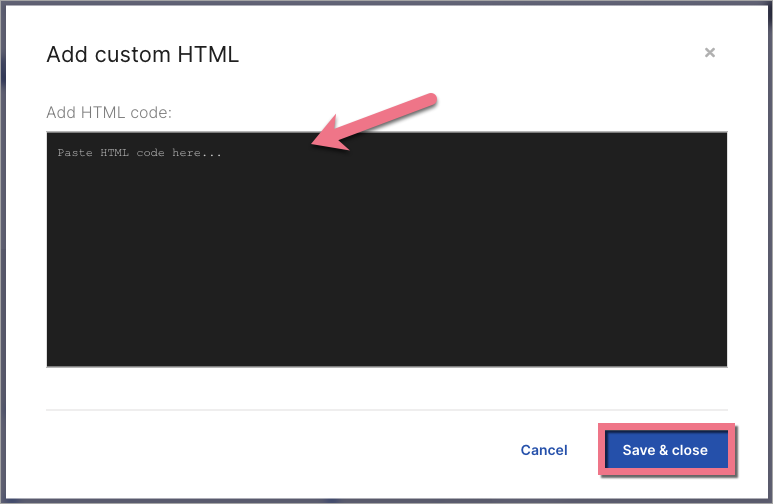
4. Click Edit. Paste the Chat Plugin code. Then Save & close.
5. Publish your landing page. Check if the chat works properly.
Changes in chat display settings
You can change the settings of the Facebook Chat Plugin at any time.
1. Go back to Add Messenger to your website in your business page settings.
2. If you want to adjust welcome messages, suggested questions, or colors, you need to click Publish in your Chat Plugin settings and refresh your landing page.
3. If you want to change the language of your plugin, click Set Up and adjust the settings. Copy the new code and in the editor of your landing page, go to the HTML widget settings, delete the old code, and paste the new one. Publish the landing page again.
Browse all integrations in our Integrations Catalog to see tools you can connect Landingi with.