ViaSocket is an API Marketplace that allows you to send leads to multiple systems. You can integrate ViaSocket with Landingi with the POST method.
Get your link from Viasocket
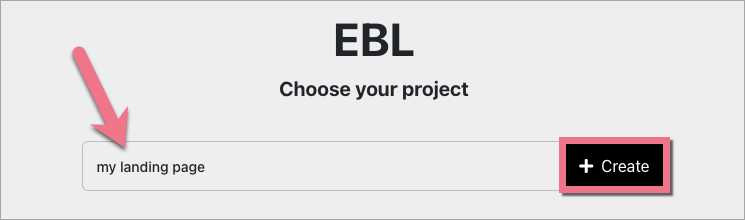
1. Log in to your ViaSocket account and choose a product. For example, we have chosen EBL.
2. Choose or create your project.
3. Click Create Endpoint.

4. Name (1) the endpoint. Copy (2) its URL and click Add Endpoint (3).

Do not close this tab.
Install the link in Landingi
1. In a new browser tab, log in to your Landingi account and navigate to the editor of your landing page.
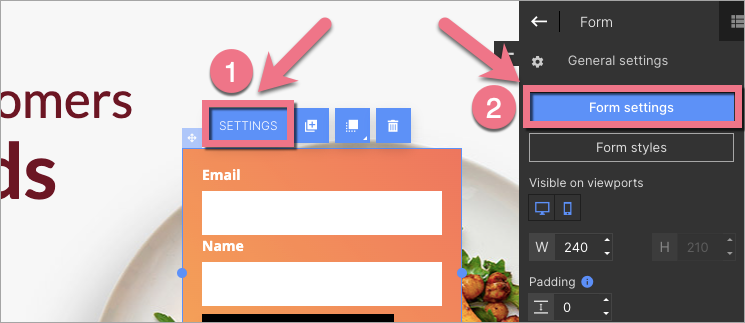
2. Click on the form and enter its Settings from the context menu (1) or toolbar (2).
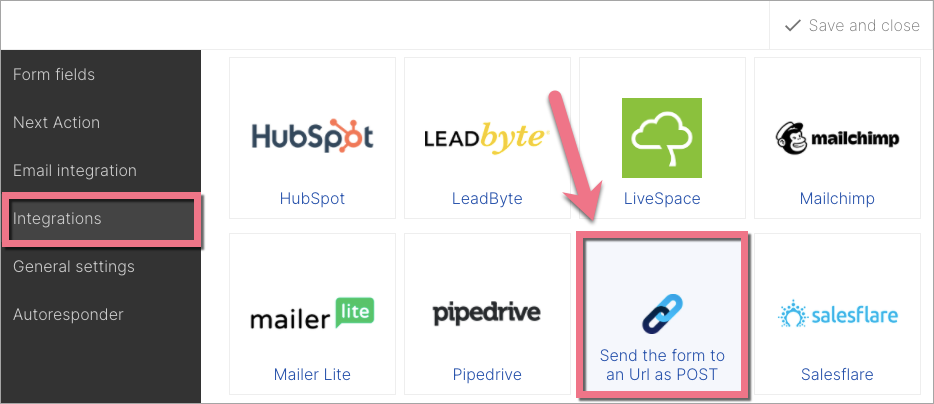
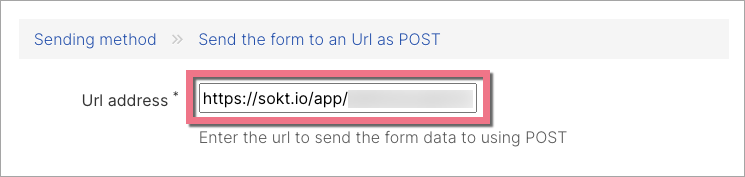
3. In the Integrations tab, choose Send the form to an URL as POST.
4. Paste the link from ViaSocket in the URL address field. Then Save and close.
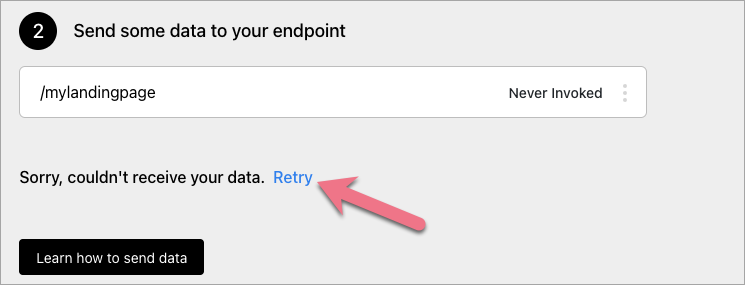
5. Publish your landing page. Fill in the form to send test data to ViaSocket.
6. Go back to ViaSocket and click Retry in Step 2.
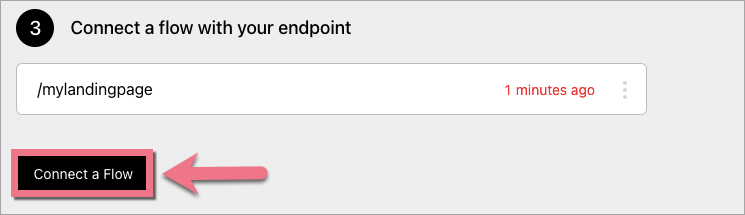
7. Next, click Connect a Flow.
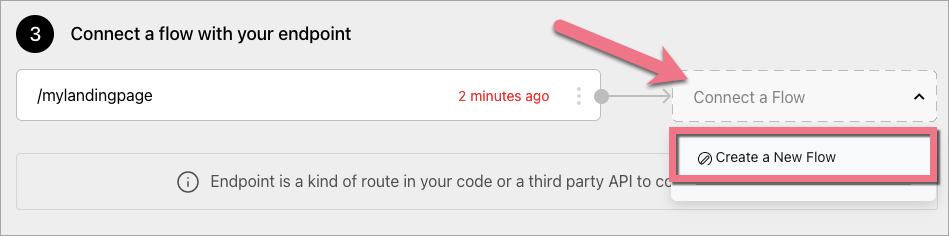
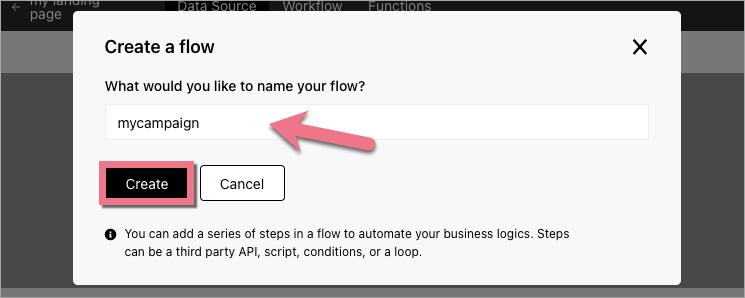
8. Select a flow or Create a New Flow.
9. Name the flow and click Create.
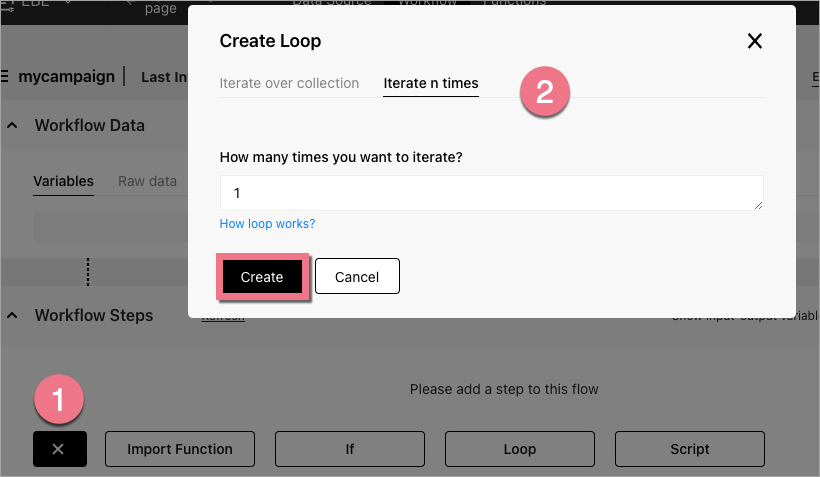
10. Add a step to the flow (1) and configure it (2). Then click Create.
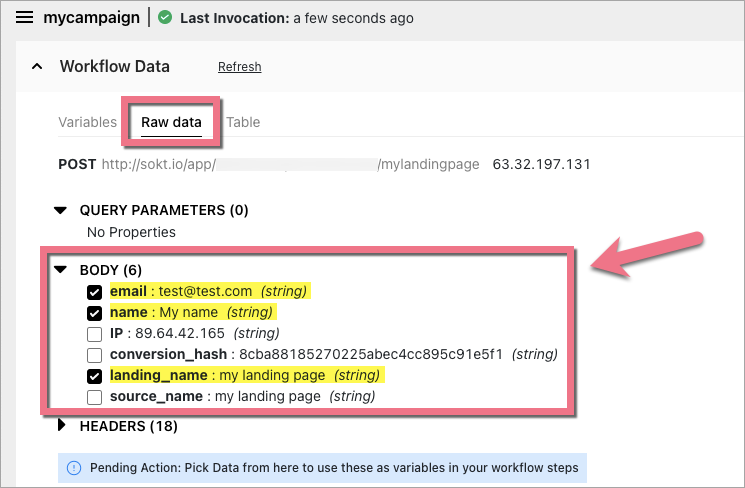
11. Go to the Raw data tab. From the Body tab, select the data you want to be sent to ViaSocket.
TIP: If you cannot see any data there, go back to your landing page and fill in the form one more time.
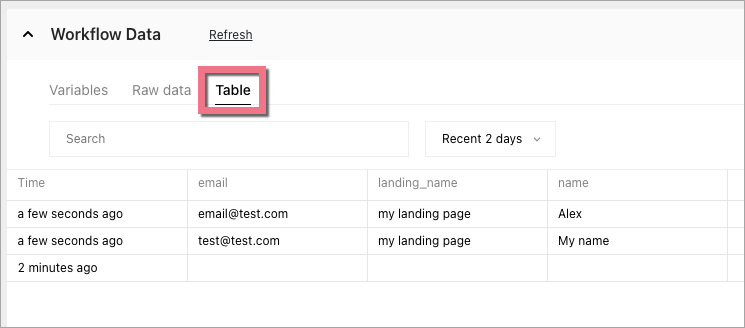
Now, your landing page form is connected to ViaSocket. You can see the leads data in the Table tab.
Browse all integrations in our Integrations Catalog to see tools you can connect Landingi with.