In Landingi, you can publish your landing page to your own subdomain. A free Let’s Encrypt SSL certificate will be automatically added for every correctly installed subdomain.
- Before you start the configuration, add the subdomain in Landingi.
- If this is your first time configuring domains in Landingi, see how to get started with domains.
This guide will show you how to set up a domain registered with Namecheap.
Access the DNS management zone in Namecheap
1. Log into your Namecheap account.
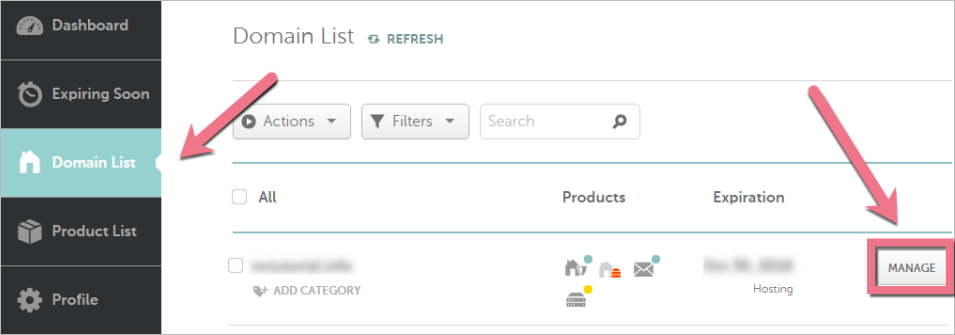
2. Select Domain List from the left sidebar and click on Manage next to your domain.
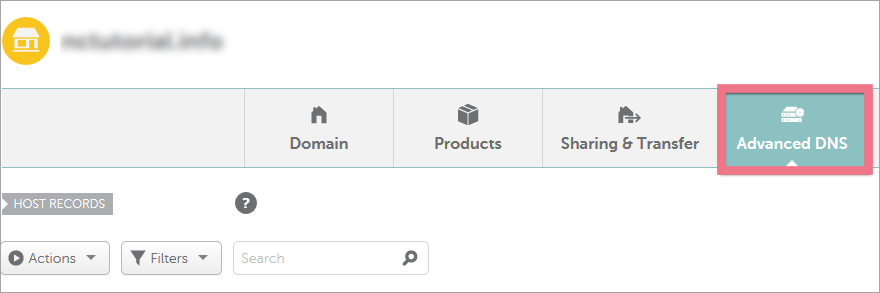
3. Select the Advanced DNS tab at the top of the page.
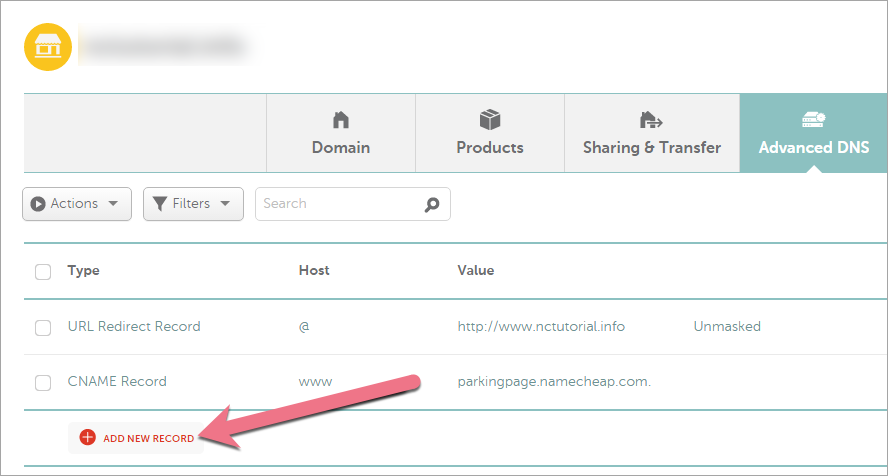
4. Find the Host Records section. To add new records, click Add new record.
Set up the DNS records
Now you need to configure the DNS records – select the type of your subdomain.
I’m setting up a www subdomain
Before you start, read about www subdomain redirection.
1. Add two A records: one for your root domain and one for the www subdomain. If you already have these records, edit their values.
2. Copy and paste the following values:
Type A
Host:
@Value:
157.53.227.1Type A
Host:
wwwValue:
157.53.227.13. Save the changes.
I’m setting up a subdomain other than www
1. Add an A record for the subdomain you want to add to Landingi. If you already have such a record, edit it.
2. Copy and paste the following values:
Type A
Name:
your subdomain name, e.g., promo for promo.domain.comValue:
157.53.227.13. Save the changes.
Finish the configuration in Landingi
When you’re ready, go back to Landingi and click on Confirm/Finish.
Once you’ve added the subdomain to your account, our system will verify whether the DNS redirections have been done correctly. During this time, an hourglass icon will be visible next to the domain with the information that the domain is being verified. Usually, the domain will be active a few hours after adding it, but the total waiting time depends on the number of domains in our system waiting in the queue to install the certificate. We will email you when the domain is installed correctly.
A green globe icon indicates an active domain. You can assign it to your landing page.
In some cases, you have to wait between 1 and 24 hours for the records to propagate.