The dynamic text allows you to personalize and customize content on the webpage by adding proper parameters to the URL address. You can successfully add dynamic text to your landing pages at the Landingi platform, also when using Google Ads and dynamic keywords.
Example of dynamic text usage
Users type different keywords in the browser while searching for your product. You want to display a different header for every group, relevant to their search, but on the same landing page with the same URL address. You don’t want to make many almost identical websites that will only differ in detail – it would be cumbersome to manage. In this case, it will be useful to put dynamic text on the landing page.
See below how it works:
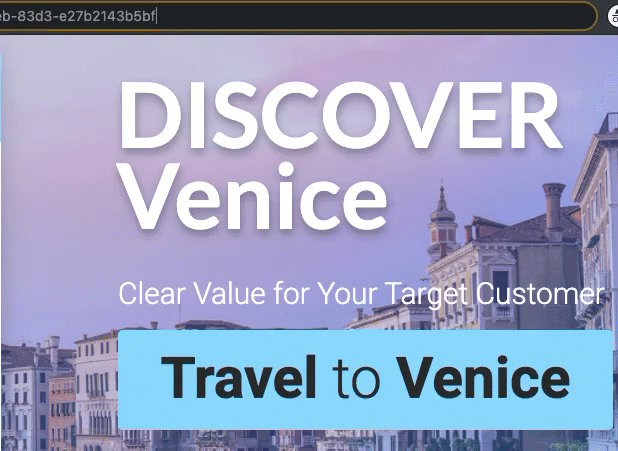
Dynamic text on a landing page
Step I (Dashboard) – capturing parameters from the landing page’s URL by JavaScript code
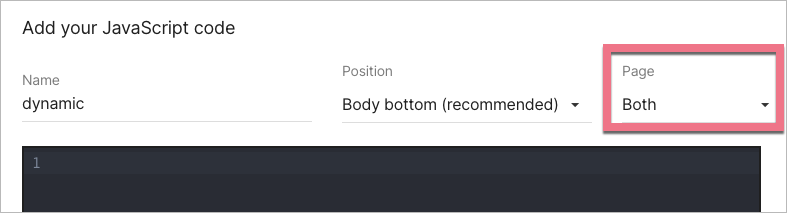
1. Log in to the Landingi platform, go to the Landing pages tab, and enter the Dashboard of the landing page.
2. Go to the JavaScript Code tab and click on Add script.
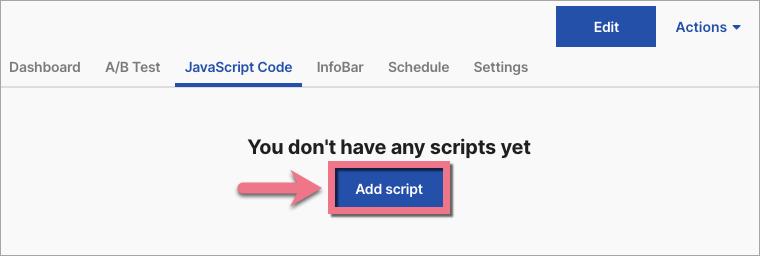
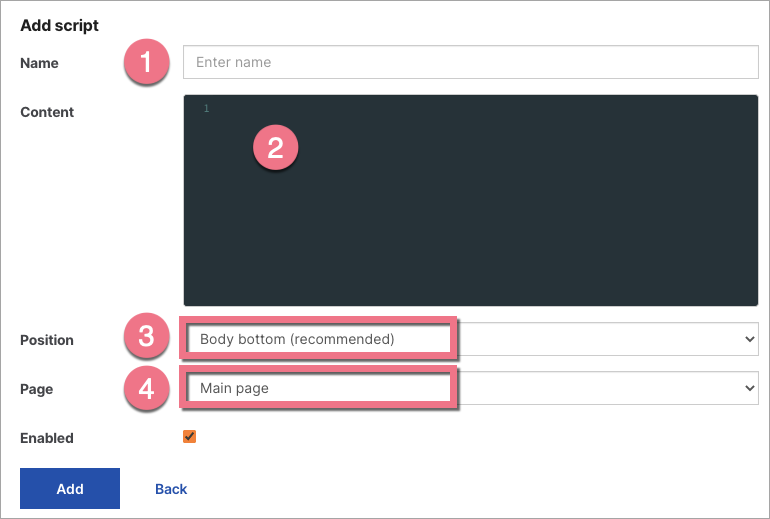
3. Name (1) the script and paste (2) the code indicated below. Choose the Body bottom (3) position on the Main page (4) of the landing page. Click Add to save the changes.
<script defer src="https://scripts.assets-landingi.com/customer-success/dynamic_replacement/dynamic.min.js"></script>
Step II (editor) – mark dynamic text on a landing page
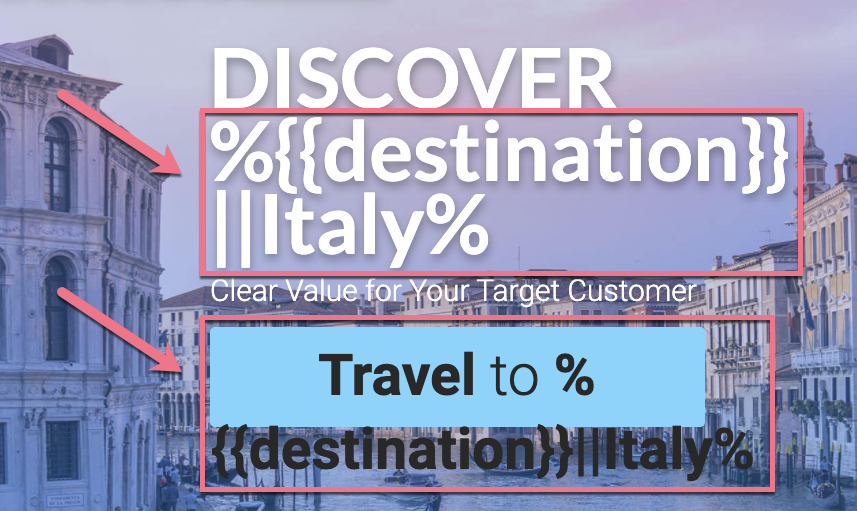
1. Enter the editor of your landing page and add properly marked text in the desired location, according to the following schema:
%{{parameter}}||default_text%
In our example, it will be:
- %{{destination}}||Italy%
More examples:
- %{{name}}||Tom%
- %{{any_parameter_name}}||any_text_here%
All dynamic text must be inserted between ‘%’ characters.
In double curly brackets, enter the name of the parameter to be passed as dynamic text.
After two vertical bars ‘||’, insert alternative text that will be displayed whenever no parameter is in the link. You can also leave this empty; in that case, no text will show up if the “general” (without parameters) link is used.
REMEMBER: You can add dynamic texts in different widgets, as many times as you need.
2. Create the link itself. Imagine, this is your general link to your landing page: www.landing_page_address.com.
To add a parameter for a dynamic text replacement, add ‘?’, parameter name, and new text. Your changed link will look like this:
- www.landing_page_address.com?destination=Italy
- www.landing_page_address.com?name=Tom
- www.landing_page_address.com?any_parameter_name=any%20text%20here
3. After completing the steps above, publish the landing page and check if the dynamic text displays correctly.
Dynamic title replacement
You can also dynamize the title of your landing page (the title that is used in a browser’s tab and social sharing).
Step 1 (Dashboard)
Add the JavaScript code as indicated above. Add it to both pages.
Step 2 (editor)
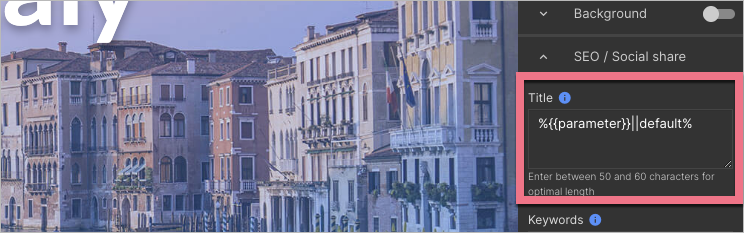
1. In the editor, find the SEO / Social share tab (under Page Settings).

When editing, you can go back to Page Settings by clicking on the arrow:
2. In the Title field, type %{{parameter}}||default%, and:
- change parameter to any parameter name you want to use (e.g., title, test, etc.);
- change default to a default title – an alternative text that will be displayed whenever no parameter is in the link.
For example, it can look like this: %{{title}}||Discover beautiful Italy!% and the default page title will be Discover beautiful Italy!
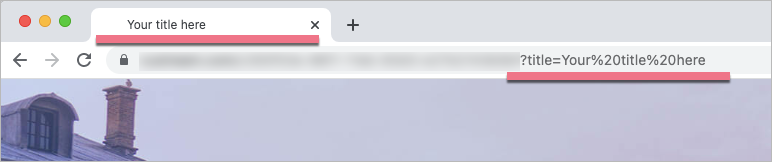
3. Create the link itself. Imagine, this is your general link to your landing page: landing_page_address.com.
To add a parameter for a dynamic title replacement, add ‘?’, parameter name, and new text.
Your changed link can look like this: landing_page_address.com?title=Your%20title%20here – and the title will be Your title here.
4. Publish the landing page and check if the dynamic title displays correctly.
Few-word parameter
When the parameter in the landing page URL address consists of two words (or more), you have to add %20 between them so that they can be displayed as separate words in the page content.
For example, your parameter consists of Rome and Italy. Include Rome%20Italy in the URL, and the dynamic parameter in the text will be separated with space: Rome Italy.
- www.landing_page_address.com?destination=Rome%20Italy
Multiple parameters in one link
You can use multiple parameters in one landing page URL address. Add ‘&’ to separate consecutive parameters.
For example, your parameters are destination=Italy and name=Tom. Build your link as follows:
- www.landing_page_address.com?destination=Italy&name=Tom
Different parameters can be placed in different widgets on one landing page.